My Blinkies


My Creative Team

Tut Writers Inc.

CT Member for


Mask #3 & #4


New Template - Snow Flakes

Spirit Of Christmas

This tutorial is written for those with a working knowledge of PSP.
I wrote this tutorial on 23 November 2010 and any resemblance to other tutorials is purely by coincidence and not intentional.
Things you need:
I used PSP X but can be made in earlier versions just as well.
I used the wonderful art of Simon Han and can be purchased at PTE. You will need a license to use this art but you can use any tube in your tag.
I used Template #196 by Blissfully Beth found Here
Scrap kit used is Spirit Of Christmas and can be found at CBJ's store Here. Thanks Jo for your fantastic kit.
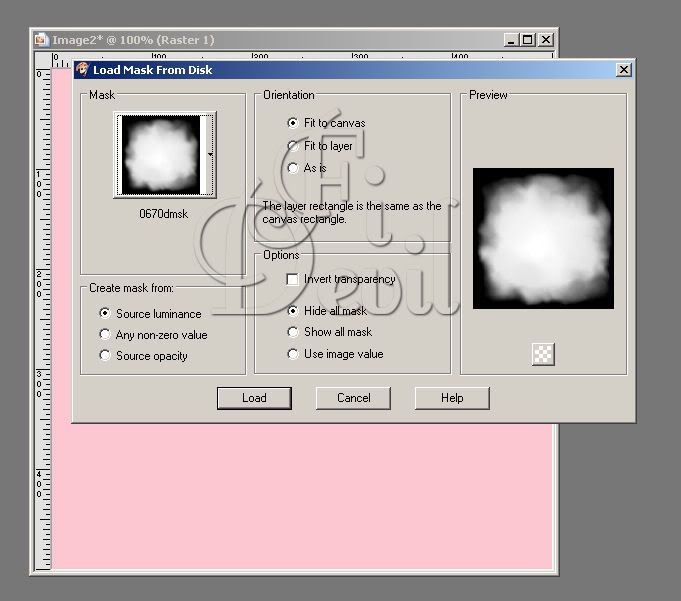
Mask of choice. I used 0670dmsk but you can use whatever you feel fits.
Font of choice. I used P22ZanerOne which is a Pay to Use font and you can find it Here.
Wordart by me. Can be found Here. Right click and Save As.
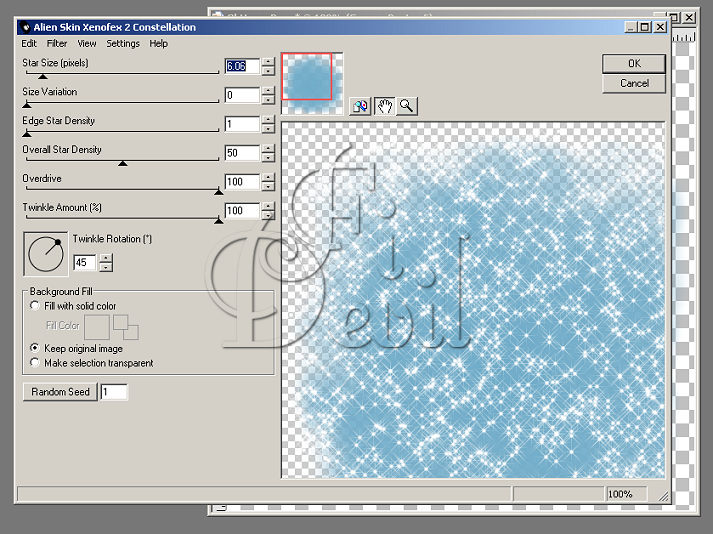
Eye Candy Impact
2. Go to your Materials Pallet and select the Foreground colours and change to a colour that will compliment your tube. I used Paper5. Highlight the first circle and go to Selections - Select All - Float - Defloat. Create a new Raster Layer and then colour this layer with the colour or paper you have chosen for your circle. Deselect.
3. Select your next circle and follow the same steps you took to re-colour the first circle.
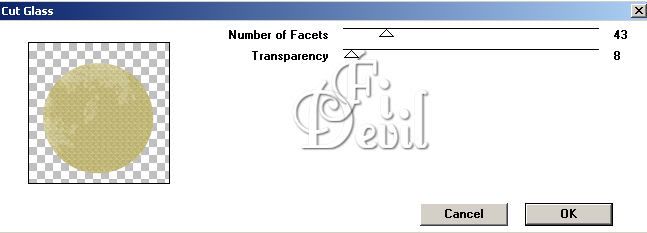
4. Once you have your circles how you want them, I then applied a glass effect by going to Effects - Plugins - Eye Candy - Impact - Glass. See settings below.

5. Select your elements you want to add to your tag and copy and paste to your tag. Place them where you want them to be.
6. Position your tube where you want it and add the copyright information on your tag. Make sure it is clear and easy to read. I used Pixelette size 8 anti alias off. I pasted the tube in the middle of the small circles and then applied a texture effect to them.

7. Add you name to your tag using your font of choice. I used P22ZanerOne size 105, anti alias sharp, bold, stroke width 1.0 font colour #765600 then I used Eye Candy Gradient Glow with the following settings.

Glow Of Autumn

Beautifully Punked
Lazy Summer Days

This tutorial was written by Fiona Devil 13th May
2010 and is my own creation. Any resemblance to yours is by pure coincidence.
This tutorial was created using PSPX but any version will work.
Supplies needed
I used the art of Rene Kunert you can find her art at PTE
Scrap kit by Fi which you can purchase Lazy Summer Days Here Mask used was my own but any will do. You can get my
mask Here.
On to the Tutorial
Open a new file 500 x 500 with a transparent background
Open the mask and hold your shift key down and depress your D key, this will
copy the mask. Close the original mask copy.
Choose a colour from your tube and add to the background layer
Select the mask and select Layers - New mask Layer – From image – Source Window
select the Mask – make sure that the Invert mask data is selected and click on
OK Select Layers – Merge – Merge Group
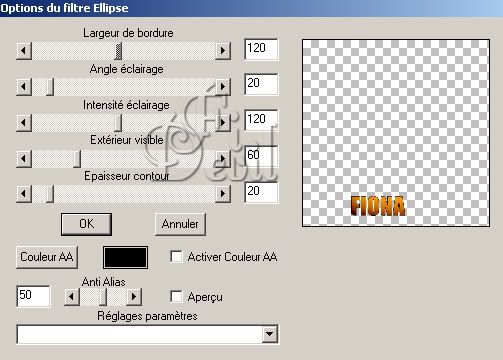
Select your Square tool and draw a square to a size that you prefer. I used the
scrap papers supplied in the scrap kit and set the border to a contrasting
colour in the tube or the paper. I set the line width to 5.
Arrange your elements on your tag as you desire.
Add your tube to the tag and apply drop shadow to your tube. Vertical 2,
Horizontal -2, Opacity 70, Blur 2 and colour Black.
Add the © to the tag and add your name using a font of choice. I used save your
tag as a JPG or PNG.
You are now done. I hope you enjoyed trying my tut. I would love to see the
results of your tags when you are done. You can email me with the results.
New Template

New Template

More Posers
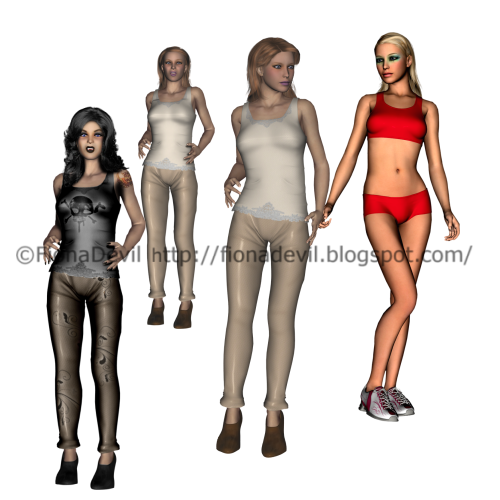
You can Download them Here
My try at Poser Art


Here is the preview of all my Maise tubes that I have created.

You can Download them Here
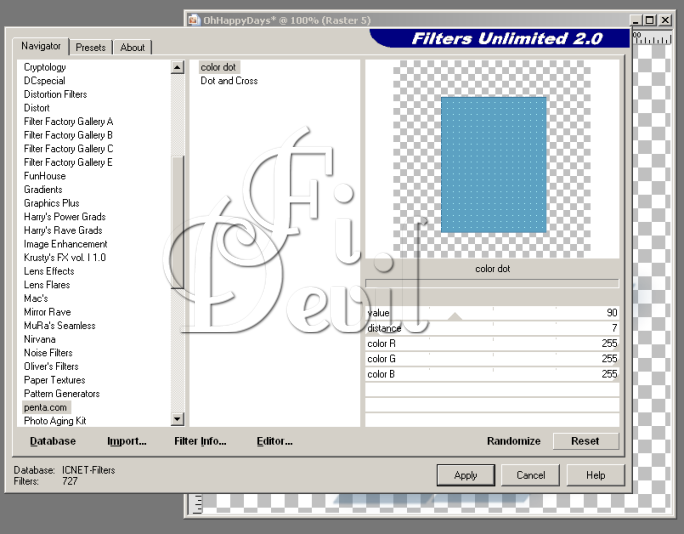
Oh Happy Day

Spring Fever


Here is another version of the tag but with another of my favourite artists Elias Chatzoudis.

Be Self Aware

YOU WILL NEED
* Paint Shop Pro - I wrote this tutorial using PSPX but you should be able to make your tag in earlier versions.
* Tube of choice. I am using the artwork of Elias Chatzoudis. You can find his work here.
* I am using a gorgeous kit called Think Pink by CBJ. You can find it here.
* Font of choice - I used Ruach LET which you can download here.
* Wordart by me, you can find it here.
* Mask of choice. I am using Mask 0670dmsk. If this is your mask, please let me know so I can credit you correctly.

Another New Mask
I am on a roll now, I better take advantage while I can. Never know when those creative juices will dry up lol...
This is my newest Mask. I sure hope someone will be able to use it.
Template 02b

Download Here
Hope for Jase

This is Jase! He and his family needs our help!!
Jase was born premature and has been struggling ever since. His family lives over 2 hours from the hospital that he is at and the distance has been taking a toll on the family. He has been diagnosed with a lung disease, heart murmurs, and recently it was discovered that Jase has a hole in all 4 ventricles of his heart ![]()
This CU Grab bag is packed with 11 never before released CU packs by Grunge & Glitter, Creationz by Jo, Gothic Inspirations, Created by Jill Scraps, Scraps by Rags, Kirsty’s Scraps, and Immortal Dreams…and it’s 100% CU!! It’s a combination of Tagger and Full size products but everything in it is totally awesome and so worth the $8!
Jase’s mom is a fellow designer and friend….Patty of Honored Scraps and the owner of Treasured Scraps!
100% of the money made from the sales of this CU Grab Bag will be directly donated to Patty to help her and her family in this time of need so that they can concentrate on helping their preemie Jase get better! The family needs money for gas and food and medical needs as they travel back and forth to their home and hospital and also as they prepare for the day when Jase does finally come home!
Click on the image to go straight to the item for purchase!!
Thank you so much!!
New Taggers Forum

I have been quite busy lately working with an oline friend trying to get our new tagging forum up and ready for the public. You can find it by clicking on the Tag.
Fi formerly from Fi's Fault, but now called Paradise PSP found Here We have worked long and hard to get this forum up and running in time for the beginning of May. We did it!!!! Yay.
Our first day was awesome and we had requests for new taggers to join us and we now have a great team who we can depend on to keep all those siggy piggies satisfied with new tags and we have challenges to keep those who can tag happy too.
I have been busy these last couple of days creating new Masks and a Template or two. I will load them as I complete them.
Open Hearted

YOU WILL NEED:
* Paint Shop Pro and Animation Shop or similar. I used PSPXII but you should be able to make this tag in earlier versions.
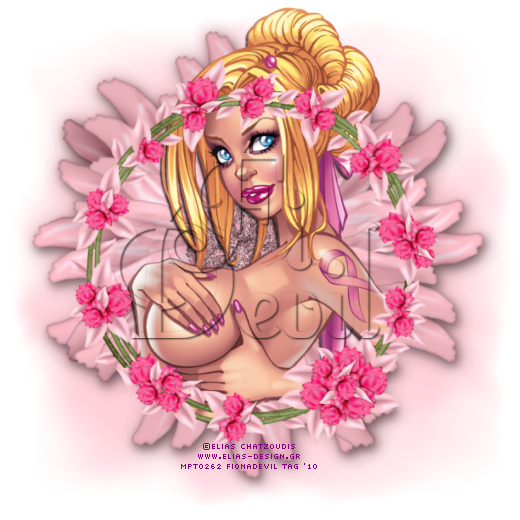
* Tube of choice. I am using the artwork of Elias Chatzoudis. You can find his work HERE
* Flower, Ribbon and Frame of choice
* Font of choice - I used PeregroyJF which you can download it HERE
* Filters used were Xero Fritillary, MuRas Copies & Eyecandy Gradient Glow (can substitute with a white drop shadow).
* Mask of choice.
LETS START!
1. Open your tube and scrap supplies in PSP. Open your font (by double clicking on it in Windows Explorer) and minimise to use later.
2. Open a new image 400 x 400 with a white background.
3. Add a new raster layer. Flood Fill with a contrasting colour in your tube. I chose #eea8b3.
4. To apply your Mask of choice go to Layers - Load/Save Mask - Load Mask from Disk - Select your mask from the drop down list - Load. Right mouse click on the layers palette and Merge Group.


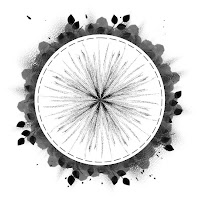
5. Copy and paste the flower of choice and place in the centre of the tag. Go to Effects - Plugins - MuRa's Meister - Copies.
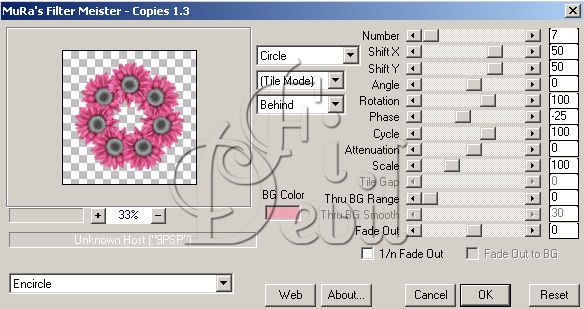
This is what you will now have on your layer.

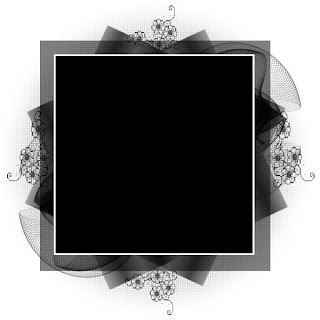
6. Open your original frame and copy your frame and paste into your workspace. Close your original frame.
7. Go to your colour palette and select a darker contrasting colour from your tube and then select your rectangle shape and draw out a shape so that it sits just behind the frame layer. Move below the frame and convert to a raster layer. Duplicate this layer two times so that you have three layers.
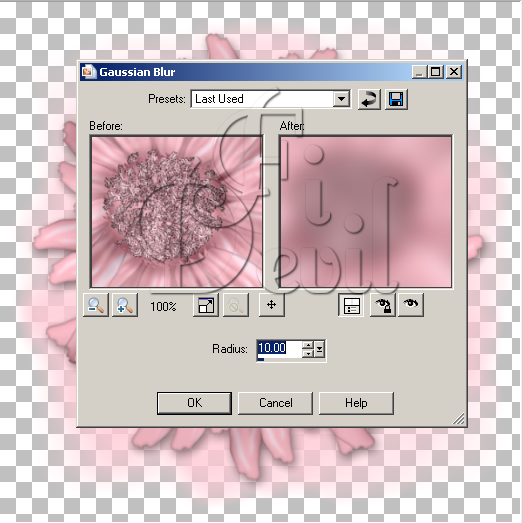
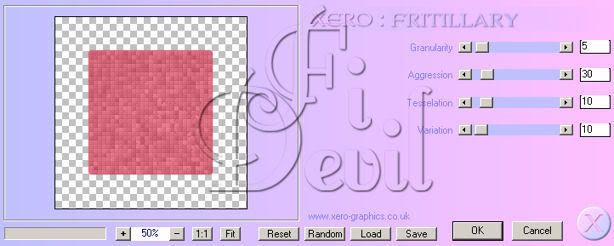
8. Select the first layer and then go Effects - Plugins - Xero - Fritillary. Using the settings below for the first layer.
9. Hide the first layer and then select the second layer and go to Effects - Plugins - Xero - Fritillary.
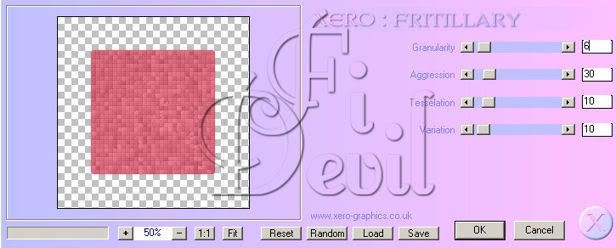
10. Hide the second layer and then select the third layer and apply the following settings.
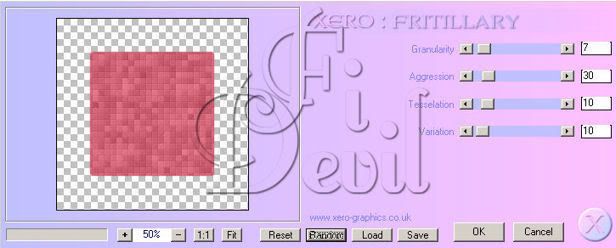
11. Now hide the third layer and unhide the first layer. Here is what you should have so far.

12. Activate your tube and copy and paste into the tag. Close your original image. Now move your image below the frame but above the background shape you have created.
13. Select your magic wand tool and select the frame layer and click in the middle of the frame. Go to Selections - Modify - Expand - Expand by 10 pixels.14. Select your tube layer and then go to Selections - Invert - Then hit your delete key which will remove any extra parts of the tube you dont want. Move the tube layer below the frame.
This is what you should now have.

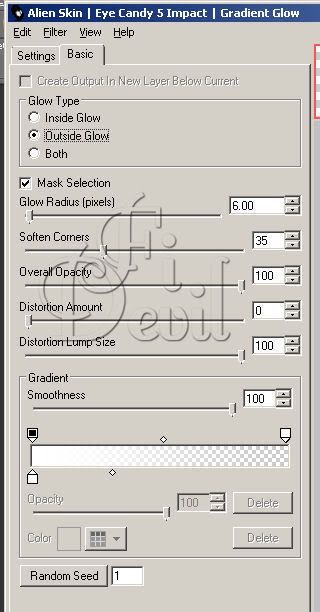
15. Add any embelishments that you desire onto the tag.16. Now put your name on the tag. Once the name is on your tag. Right mouse click on the layer and convert to Raster layer. Go to Effects - Plugins - Eye Candy - Gradient Glow and apply settings set out below.
17. Now add the copyright information. Now go to Edit - Copy Merged.
18. Open up Animation Shop and go to Edit - Paste - Paste as new animation.
19. Go back to Paint Shop Pro and hide the first layer of the shape and unhide the second layer. Go to Edit - Copy Merged.
20. Go to Animation Shop and go to Edit - Paste - After Current Frame. Do the same for the third layer.
Save your tag as a gif and you are finished.
I hope you enjoyed doing my tutorial.
This tutorial was written on 2nd June 2008.
Any resemblance to another tutorial is purely coincidental.
©Fi_Devil Tutorials

