My Blinkies
Feel free to grab my blinkie to display on your blog.


My Creative Team

Tut Writers Inc.

CT Member for


26 May 2011
Fired Up

This tutorial was written for those with a working knowledge of Paint Shop Pro.
What you will Need:
*Paint Shop Pro (I used PSP X but any version will work).
*Tube of choice, I used the fantastic work of Enys Guerrero. You can purchase her images from Dreamscape Imaging found HERE.
*Scrap kit of choice, I used the gorgeous Fire kit by Angels Designz found HERE.
*Mask of choice. I used one called Dec3 made by giZZy from Rebel Dezigns You can download it from HERE. I have permission to include this mask in my tutorial. Please do not change the name of this mask.
*Font of Choice. I used was Phraxtured. You can find it HERE.
*Filter used - Eye Candy - Gradient Glow
Lets Begin:
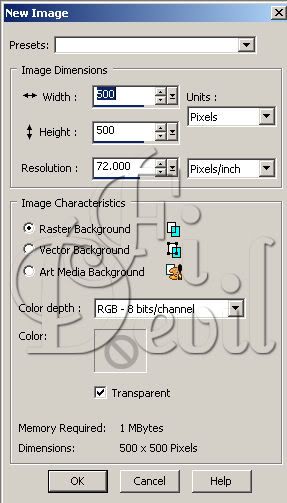
1. Open a blank image 500 x 500 with transparent background.
2. Select the colour for your background. I chose AD_Paper7. Copy your paper and paste to your blank image, then reduce to 60%. Apply your mask to this layer. Layers - Load/Save Mask - Load Mask From Disk - Select your mask and Load.

3. Open your frame. I chose the AD_Frame3, copy your frame and paste to your canvas and reduce by 80% add drop shadow as desired.

4. Select your ellipse tool, make sure it is set to the Circle - Create on Vector - Anti-alias ticked. Foreground colour set to Black, background colour set to a colour matching your tube. I chose #53161d. Draw out your mask to fill the middle of your frame and a little bit more.
5. On your circle, go to Effects - Texture Effects - Weave - and apply the settings as shown below.
6. Open your chosen elements and place on your image where desired. Apply drop shadow as desired.
7. Open your tube and copy to your tag background. Place the tube on the top of the frame and using your eraser tool, remove the parts of the tube you dont want on the top of the frame.
8. Add the artist © to your tag and if you need to give credit for the scrap kit you used, also add the credits to your tag. I always use Pixelette for my © set to size 8 pixels. This allows the copyright to be seen clearly.
9. Add your name to your tag and merge all layers and save as a JPG or PNG.
You are now finished.
Thank you for trying my tutorial.
This tutorial was written by me on May 26th 2011.
Any resemblance to another tutorial is purely coincidental.
©Fi_Devil Tutorials
Birthday Bash

This tutorial was written for those with a working knowledge of Paint Shop Pro.
*For this tutorial you will need Paint Shop Pro - I used PSP X (any version will do)
*Tube of choice, I used the gorgeous work of Tatjana Willms. You can purchase a license from HERE. Please don't use tubes which are licensed unless you purchase the right to use them
*Scrap kit of choice. I used the Birthday Bash scrapkit by Angels Designz, can be found HERE.
*Mask of Choice
Font of Choice - I used OfficeScriptDT
Font of Choice - I used OfficeScriptDT
**Remember Save often**
Lets Begin
1. Open up a new Image 500 x 500 with the background on Transparent as shown below.
2. Select one of the papers or a colour that will compliment your tube. I chose AD_Paper6
Add your mask to your paper layer. Layers - Load/Save Mask - Load Mask from Disk - Select your chosen mask and ensure your Invert Transparency is unticked. If this doesn't work as shown, you might need to put a tick in the Invert Transparency box. Select Load.
I reduced the opacity to 75% so that it wasn't such a strong pattern and blurred the image by 2.
I reduced the opacity to 75% so that it wasn't such a strong pattern and blurred the image by 2.

3. Next open the AD_ColorfulSplatter and reduce in size to fit your image. I reduced by 80% Copy and paste to your image.
4. Now open your Frame and put onto your image. Grab your selection tool and click on the middle of the frame till you have the dancing ants. Go to Selections - Modify - Expand - Expand by 5 pixels, make sure you select the Sparkles layer and hit delete. You should now have the frame without the sparkles in the middle.

5. Select the elements you wish to add to your tag and place where they will enhance your tag. As seen below.

6. Select your tube and paste to your tag. You can have your tube behind your frame or partly on top as show by my tag. Move your tube layer below your frame. If you want parts of your tube to be on top of the frame. Duplicate your tube and then remove the parts that you want showing behind the frame layer. Add the © copyright information on your tag and then you are ready to add your name to the tag.
Add your name and save as a PNG or JPG.

You are now finished.
Thank you for trying my tutorial.
This tutorial was written by me on May 26th 2011.
Any resemblance to another tutorial is purely coincidental.
©Fi_Devil Tutorials
Thank you for trying my tutorial.
This tutorial was written by me on May 26th 2011.
Any resemblance to another tutorial is purely coincidental.
©Fi_Devil Tutorials
Cluster Frame
I have been really busy with real life issues these last couple of months so my creativity hasn't really been up to par. I was going through my tags and other things and found something I had intended to post here but forgot all about it. The ladies who I CT for have been really understanding and I want to thank them for their support.
I made a cluster frame using the awesome kit Birthday Bash by the amazing Angels Designz which you can find HERE I actually made this frame in January this year but have only just now remembered I had it haha sorry about that Angel.

Subscribe to:
Posts (Atom)
