My Blinkies
Feel free to grab my blinkie to display on your blog.


My Creative Team

Tut Writers Inc.

CT Member for


16 July 2010
Be Self Aware

YOU WILL NEED
* Paint Shop Pro - I wrote this tutorial using PSPX but you should be able to make your tag in earlier versions.
* Tube of choice. I am using the artwork of Elias Chatzoudis. You can find his work here.
* I am using a gorgeous kit called Think Pink by CBJ. You can find it here.
* Font of choice - I used Ruach LET which you can download here.
* Wordart by me, you can find it here.
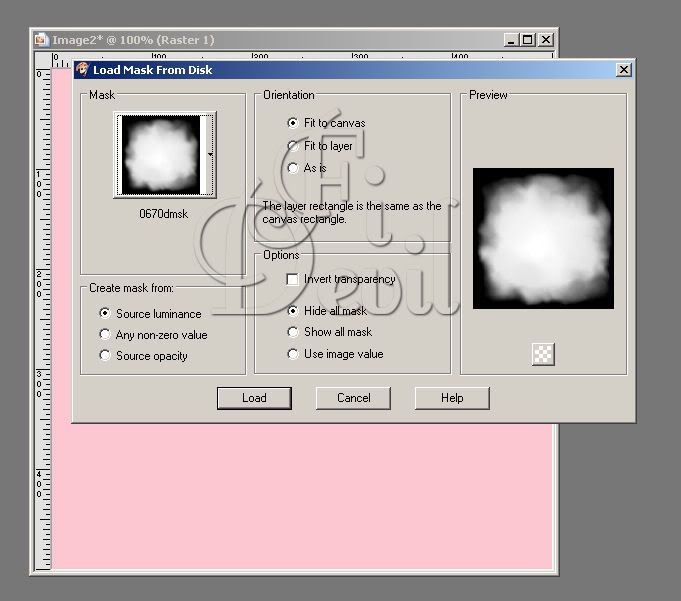
* Mask of choice. I am using Mask 0670dmsk. If this is your mask, please let me know so I can credit you correctly.
LETS START
1. Open your tube and scrap supplies in PSP. Open your font (by double clicking on it in Windows Explorer) and minimise to use later.
2. Open a new Image 500 x 500 with a transparent background.
3. Add a new raster layer. Flood fill with a contrasting colour in your tube. I chose #fcc7d2.
4. To apply your mask of choice go to Layers - Load/Save Mask - Load Mask from Disk - Select your mask from the drop down list - Load. Right mouse click on the layers palette and Merge Group.
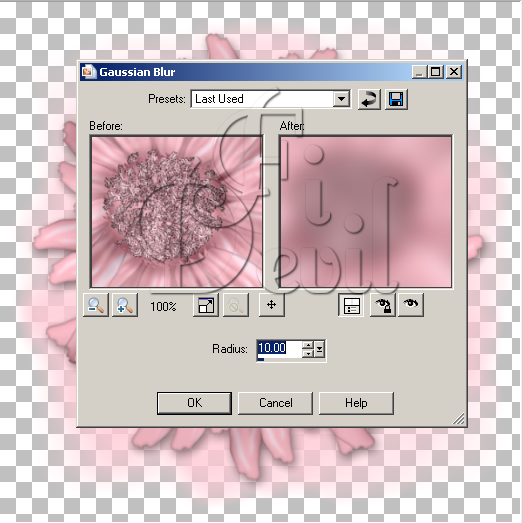
5. Place your element you are using for the background where you want it to appear on your tag. Duplicate your element. Make sure your element is selected in the layers and then go Layers - Duplicate. Then go to Adjust - Blur - Gaussian blur with the following settings.
6. Add your frame of choice to the background and then your tube.
7. Once you have your tube place where you want it. Select your eraser tool and erase the frame where the head is positioned if you desire.

8. Add other elements to your tag and then add the © information.
9. Copy and paste the Wordart provided or use any other kind of wordart to your tag. Position where you want it to be.

10. Add your name with your font of choice. With contrasting colour. I used #800080.
11. Save as a PNG or JPG file and you have your tag. You are now finished
I hope you enjoyed doing my tutorial.
This tutorial was written by me on 14th July 2010.
Any resemblance to any other tutorial is purely coincidental.
©FionaDevil Tutorials
Subscribe to:
Post Comments (Atom)

0 comments:
Post a Comment