My Blinkies
Feel free to grab my blinkie to display on your blog.


My Creative Team

Tut Writers Inc.

CT Member for


17 July 2010
Oh Happy Day

You Will Need
*Paint Shop Pro - I used PSPX but any version will work just as well.
Tube of choice. I used the fabulous work of Keith Garvey which can be found here.
*Scrap Kit of choice - I used a fabulous PTU kit from CBJ called Happy Days,
which can be purchased here.
* Filters needed - Penta.com & Alien Skin Xenofex 2 - Constellation.
*Mask of choice - I used 2 (you can just use the one).
*Font of choice. - I used 1 BeanSprout DNA
Lets get started
1. Open a new transparent background 550 x 550
2. This next step is purely as a personal choice. You dont need to use two masks. For the first mask. Fill the canvas with a colour of choice and apply your mask. Layers - Load/Save Mask - Load Mask from Disk - Select your mask and OK. In the layers palette, highlight the main image and then go to the top of your window and select Layers - Merge - Merge Group.
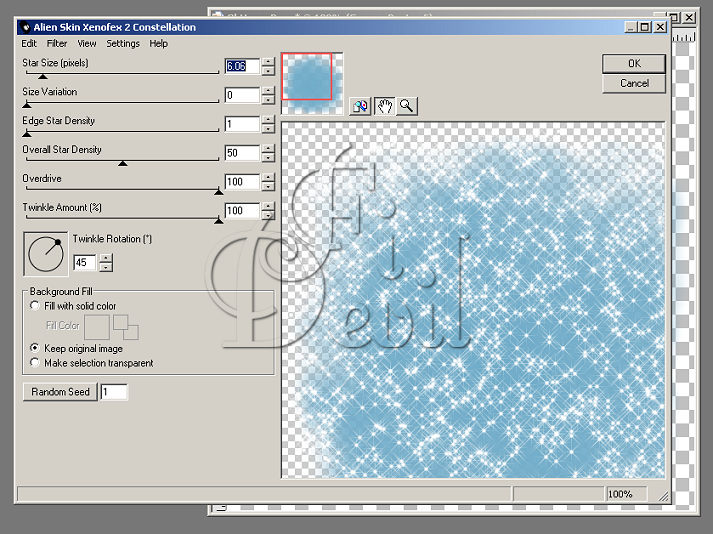
3. Add a new layer. Layers - New Raster Layer - Call this one Secondary Background Layer. Select the mask you want for this one and merge layer as instructed above. Now to apply the filter. Go to Effects - Plugins - Alien Skin Xenofex 2 - Constellation. Apply the settings as shown below. You can have a play around and see what appeals to you.
4. Place your frame and elements on the background. Next select your Rectangle Tool and set your background palette to a colour that will compliment your tube and draw out a shape to the size you desire.
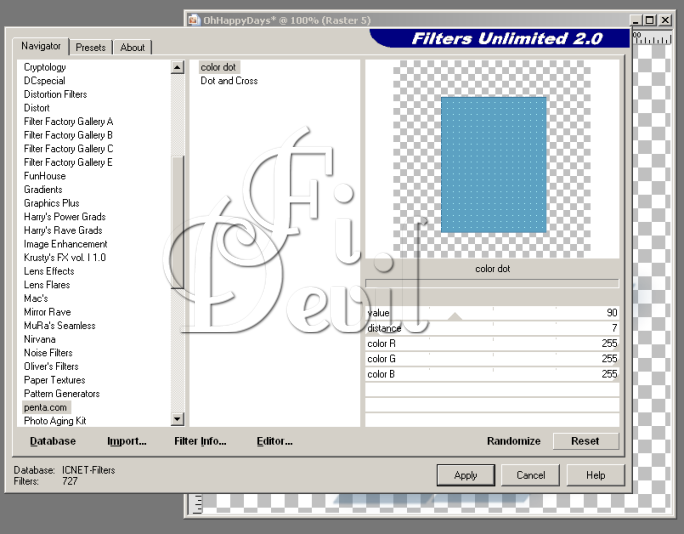
5. Now apply your filter to this Rectangle. I converted the rectangle to raster layer and then applied Penta Dot filter.Effects - Plugins - Filters Unlimited - Penta.com - Colour Dot - with the following settings.
6. Next add your tube and position to your satisfaction. Now add the © Copyright information.
7. Next I then selected a paper from the kit and selected it as the background colour in the Materials Palette. I then selected the Eclipse tool and drew out an oval shape which I softened by adding a bit of a blur to it. Adjust - Blur - Gaussian Blur and Radius set to 25 - OK.
8. Add your name with font of choice my font was set to 55 - Anti Alias Sharp in the colour #b84a83. Now save your tag as a JPG or PNG file.
You are now finished.
I hope you enjoyed doing my tutorial.
This tutorial was written on 18th July 2010.
This is my own work and not copied from any other tutorial.
Any resemblance to any other tutorial is purely coincidental.
©FionaDevil Tutorials
Subscribe to:
Post Comments (Atom)

0 comments:
Post a Comment