My Blinkies
Feel free to grab my blinkie to display on your blog.


My Creative Team

Tut Writers Inc.

CT Member for


10 April 2010
Wild Thing
YOU WILL NEED
* Paint Shop Pro and Animation Shop or similar. I used PSP XII but you should be able to make this tag in earlier versions.
*You will need a tube of choice. I chose the wonderful work of Marjolein Gulinski.
*You can find her work here at My PSP Tubes
*Mask of choice. I used a mask from Here. tp_mask 7.
*Scrap Kit Vintage Rose by Farrah. This kit is no longer available in her store.
*Kit supplied (with permission) Here
LETS START!
1. Open all your supplies in PSP. Open your font (by double clicking on it in Windows Explorer) and minimise to use later.
2. Open a new image 500 x 500 with a white background.
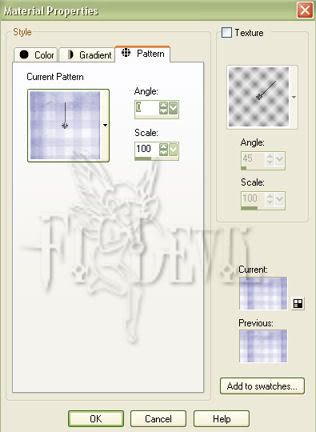
3. Add a new raster layer. Activate your Flood Fill Tool. In your colour palette change your Foreground colour to Pattern. Select the patterned paper from the scrap kit or a colour that blends with your tube.
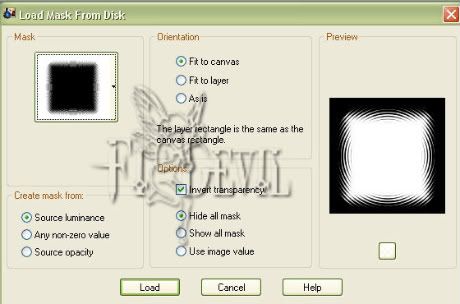
4. Go to Layers - New Mask Layer - from Image - select the mask of your choice with the settings as shown in the image below.
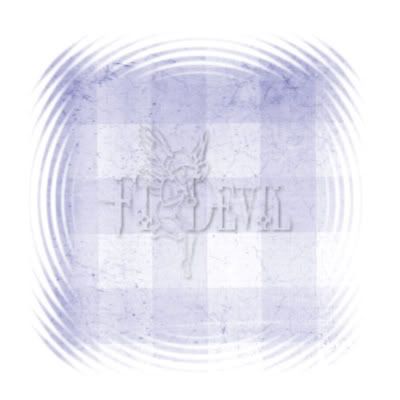
Your image should look something like this.
5. Select the element of choice. I selected the Vintage Rose Doodle. Copy and paste as a new layer. Close the original image.
Right mouse click on the layer with the frame and duplicate. Now go to Image - Flip - Image - Mirror.
Your image should now look like this.

6. Select your tool selection set to Rectangle with the foreground selection as a darker shade from your tube and the background set
to the paper pattern you previously used for the mask layer or a contrasting shade. Draw out the rectangle for about half of the image size.
Once this is done, convert this layer to a raster layer.

7. Now with the rectangle tool, draw out a smaller rectangle above the larger rectangle. As shown below.

8. Copy this layer and then go to Image - Flip. Position the layer to just below the bottom of the middle rectangle as shown below.

9. Place your tube on the tag and add embelishments as you desire. See the finished tag at the beginning of the tutorial. Hide the embelishments and the image. Go to Edit - Copy Merged.
10. Now go to Animation shop. Now go to Edit - Paste as a New Animation. Now you will need to duplicate this layer to be the same as the animation. Edit - Propagate Paste - Next go to Edit - Duplicate Selected. Do this till you have the same amount of images as there is in the animated tiles. Now go to Edit - Select all - Edit - Copy. Now go to your tag and do the same. Edit - Select All. Now go Edit - Paste - Into Selected Frame. Place where you want on the tag. When you are finished, save this as a gif image.
11. Go back to PSP and unhide the embellishments and the tube. Now you will need to hide the background layer and the doodles and rectangle layers.
12. Go to Edit - Copy Merged and then go to Animation Shop select the tag. Edit - Select All. Edit - Paste into Selection.
Place this layer as you would like them.
Now save your tag.
13. Go back to PSP and put your © information on the tag and add your name.
14. Follow the previous steps to add this information to your animated tag.
Save your tag and you are finished.
I hope you enjoyed doing my tutorial.
This tutorial was written on 20th May 2008.
Any resemblance to another tutorial is purely coincidental.
©Fi_Devil Tutorials

Subscribe to:
Post Comments (Atom)

0 comments:
Post a Comment