My Blinkies
Feel free to grab my blinkie to display on your blog.


My Creative Team

Tut Writers Inc.

CT Member for


10 April 2010
Fly Girl
This tutorial was written for those with a working knowledge of PSP
Written for PSP XI (Will work in other versions)
Select your tube, I chose the wonderful artwork from Elias Chatzoudis found My PSP Tubes
Scrap Kit called My Fantasy Scrap Kit from Passionate Scraps. Thanks to Mandy.
I used a mask from Candy's Treats for this tutorial found Here
Filters Used Eye Candy 5 Impact: Gradient Glow
Font of choice. I used Saginaw and Pixelette.
Lets Begin
1. Start by opening up a blank tag 500 x 500 and then flood fill with white. Open your scrap supplies you plan to use for your tag and minimise.
2. Go to Layers - New Raster Layer - Flood fill with a contrasting colour from your tube. Open up your Mask layer and go to Layers - New Mask Layer - From Image -
Select the Mask from the drop down list. Ensure that Invert Mask Data is selected as shown below.

3. On the Layers panel right mouse click on the mask layer and select Merge - Merge Group.
4. Open the tube you plan to use and reduce to size. I reduced mine by 85%. Minimise tube and we will come back to it later.
5. Open your doodles and copy and paste to your tag. Reduce to fit if needed. Place them where you think they will be of the most effect.
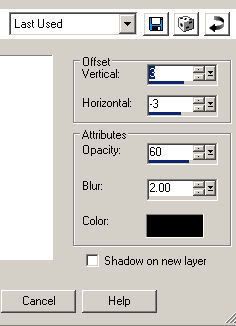
Add a drop shadow. O = 3 and H = -3, Opacity 60 and Blur 2 Colour Black.
6. Open your frame you will be using and copy and paste to your image. Resize if needed. Add drop shadow same settings as the doodles.
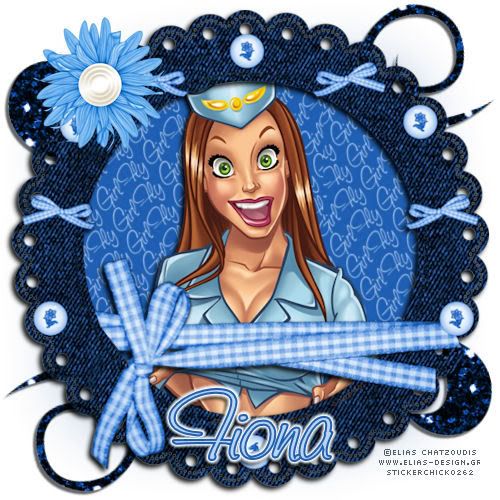
7. Select a paper from your scrap kit to match the tube or use a contrasting colour and select the circle preset shape. Make sure that the circle is just a little bit bigger than the centre of the frame. Right mouse click on the circle layer and convert to layer. I then wrote the words Fly Girl and duplicated and positioned where I wanted it to show on my paper. Merge your multiple layers so that you only have the one layer showing with the words. Now move these layers below the frame.
8. Open your tube and place between the scrap circle and the frame. Add a drop shadow to the tube as used above.
9. Add your embellishments to the tag as you desire. Adding drop shadow for effect.
10. Add your copyright information to the tag. I used Pixelette font for this. Size 8 Anti Alias off.
11. Now add your name. I set my font size to 72 anti alias Sharp with stroke width at 1.00.
Set your forground colour to a dark shade in your tag and the background colour for a lighter colour used in your tag.
12. Write your name and position where you want it on your tag.
Right mouse click on the layer with your name and convert to raster layer.
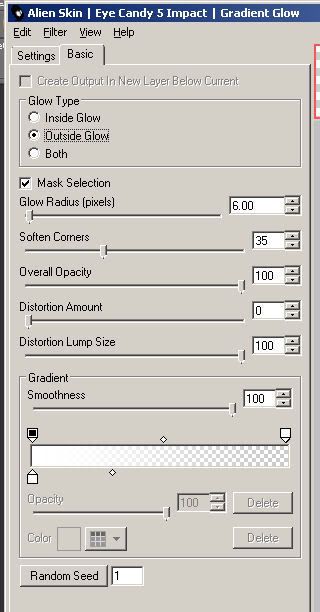
13. Next go to your Effects - Plugins - Eyecandy 5 Impact - Gradient Glow - Select the settings as shown below and then select OK.
14. Apply the same settings for the drop shadow to the name.
15. Now go to Layers - Merge - Merge All (Flatten)
Save as a JPG image.
You are finished.
I hope you enjoyed doing my tutorial.
This tutorial was written on 12th May 2008.
Any resemblance to another tutorial is purely coincidental.
©Fi_Devil Tutorials

Subscribe to:
Post Comments (Atom)

0 comments:
Post a Comment