About Me
Copyright Text
Blog Layout Created By Fiona Devil
Artwork by ©Arthur Crowe
My Blinkies
Feel free to grab my blinkie to display on your blog.


Chat Box
Powered by Blogger.
31 January 2011
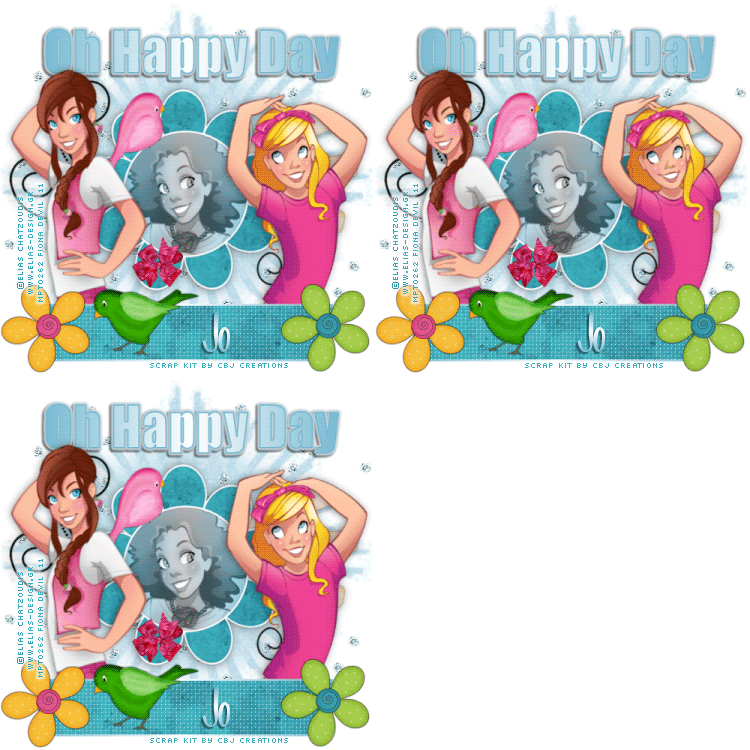
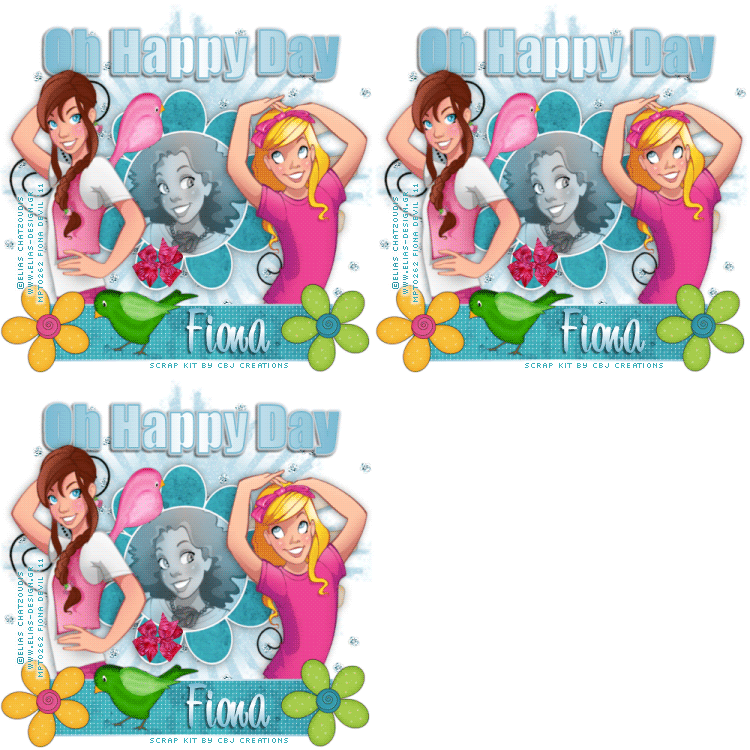
Oh Happy Day
Items Needed:
This tutorial was written for those with a working knowledge of Paint Shop Pro.
Paint Shop Pro (I used PSP X, but any version will work just fine).
Animation Shop or Photoshop.
Im using the fabulous scrap kit Happy Days by the wonderful CBJ. You can purchase it HERE. Thank you Jo for this gorgeous kit.
You will need two or three tubes one close up and one or two other tubes by the same artist.
I chose Elias Chatzoudis. You will need a licence to use his artwork. You can purchase them HERE.
Filters - I used Xenofex 2 - Constellation & Texture Effects - Weave.
Mask of choice
Lets Begin:
Open a transparent 500 x 500 image
Copy and paste a frame to your canvas. I chose the Flower Doodle Frame 2. Select your Magic wand tool and select inside the frame. Go to selections - Modify - Expand - Expand by 3. Leaving the inside of the frame selected, place your tube in the centre and highlight the tube.
Select Selections - Invert - Hit your delete key. This will remove the excess tube from your tag. Selections - Deselect.
I used Paper 9 for the rectangle. Close off the foreground colour and make your rectangle as large as you need it.
Once you have your rectangle to the size you need. Apply your filter.
Effects - Texture Effects - Weave - with the following settings - Gap 1, Width 4, Opacity 14, Fill gaps ticked, Weave & Gap colour #FFFFFF
Place elements on your tag where they look the best.
Add your © layer to your tag.
Merge your layers together - Layers - Merge - Merge Visible.
Once you have your tag has been merged. Go to Layers - New Raster Layer - Blend mode normal.
Move this layer to the bottom of the layers pallette and name it background.
Select a contrasting colour from your tubes and highlight the background layer on your layers palette. Select the paint tool and flood fill your background layer with your contrasting colour.
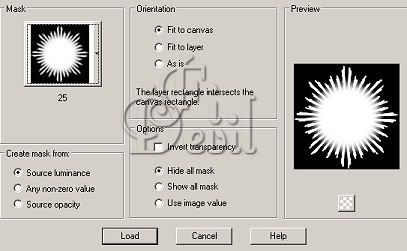
Now go to Layers - Load/Save Mask - Load Mask from Disk. Apply your mask and merge group.
Highlight the mask layer and duplicate it twice so that you now have three layers with the mask on it.
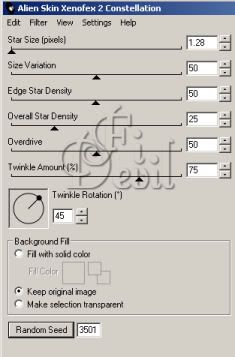
Now go to Effects - Plugins - Xenofex 2 - Constellation with the following settings.
Close off the first layer and then select the second mask layer. Change the Random Seed. Close off this layer and then select the last mask layer changing the Random Seed again.
Duplicate your tag layer two times and move them so that there is a mask layer under each one.
Create a new layer and flood fill with White. Duplicate this layer two times and place under each layer of your tag.
If you want to keep it as a static tag skip the multiple layers and merge and save as a JPG or PNG. Add your name and you are done.
To animate your tag, save your tag as a PSD file so you can open it in Animation Shop.
Open Animation Shop and open your tag.
You should have three frames, now save as a GIF.
You have finished.
Thank you for trying my tutorial.
This tutorial was written by me on Monday 31st January 2011 and any similarity to any other tutorial is purely unintentional.
Tutorial by ©FiDevil Tutorials
Labels:
Tutorial
|
0
comments
Masks 12 - 23
I was sitting playing in PSP and these masks just seemed to fall together. I hope you can use them. If you use them in tutorials, please send them to here to download them. Thank you.
Mask 12
Mask 13
Mask 14
Mask 15
Mask 16
Mask 17
Mask 18
Mask 19
Mask 20
Mask 21
Mask 22
Mask 23
To save these masks, click on the mask you would like, once it has expanded to the correct size, Right Mouse click and Save As
Labels:
Masks
|
1 comments
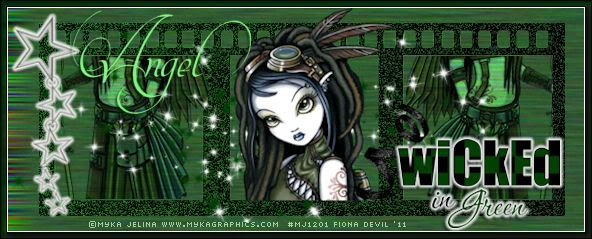
New forum set made using Angels Designz scrap kit Wicked in Green
I had fun using this kit. This kit is one of a series of 4. Angel also has Wicked in Black, Pink and Purple.
Labels:
Tags
|
0
comments
18 January 2011
I really should get my butt into gear and start writing more tutorials and making more tags. I have been very busy lately with helping some friends out with the closing down of one part of their business. I cant do an aweful lot for them but I am able to scan documents into their external hard drive and then back it all up on dvd so that they can delete their personal stuff off their work computers. These friends have been managing a 5 star Resort nearly 2 hours away from where I live. It is really a hard job. I get to relax in the pool after work and sit in an air conditioned office all day scanning. How hard can it get?
The only drawback is that I have to be away from home while Im here so I really miss my hubby and my little baby my dog. I have a black toy poodle who is the child I will never have and he brings such joy to my life and is sooooo attentive and loving. He accepts me for who I am and will be there if I need a cuddle.
The only drawback is that I have to be away from home while Im here so I really miss my hubby and my little baby my dog. I have a black toy poodle who is the child I will never have and he brings such joy to my life and is sooooo attentive and loving. He accepts me for who I am and will be there if I need a cuddle.
16 January 2011
Bitch Squad
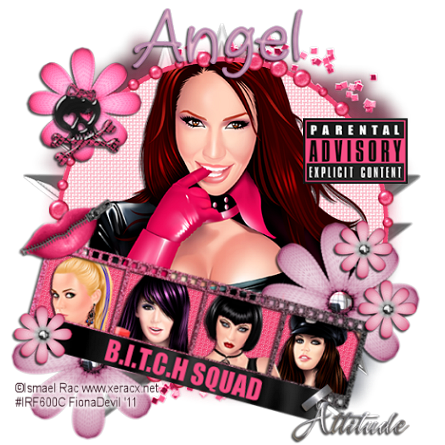
I wrote this tutorial for those with a working knowledge of Paint Shop Pro.
This is all my own work and any similarity to other tutorials is purely by chance.
You will need:
Paint Shop Pro - I used PSP X but any version will work just as well. You can download a trial version HERE
Tube of choice. I used the marvelous artwork of Ismael Rac. You need a licence to use his artwork. You can purchase the tube HERE
Filters Used: Eye Candy Gradient Glow
Scrap kit of choice. I used this awesome scrap kit called The Bitch Squad by Angels Designz. You can purchase the kit HERE
Font of Choice - I used 2Peas Raspberry
Lets get Started
Open a 500 x 500 blank canvas transparent background.
Open the AD_MeshBacking. Copy the mesh and paste onto your blank canvas. Reduce by 80%.
Next go to Adjust - Blur - Gaussian Blur Radius set to 8.00
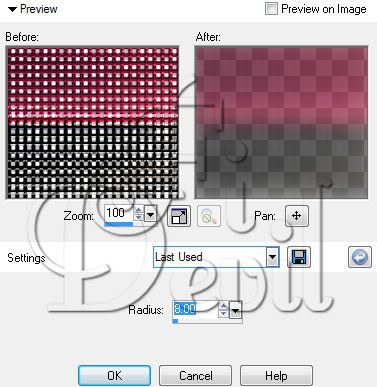
Open AD_Frame3 and copy the frame and paste into your tag. Reduce by 75%. Select your Ellipse tool. Select the circle.
Select your colours having your Foreground colour set to a colour to either match the frame or your tube.
Effects - Texture Effects - Weave, Set to the settings seen below.
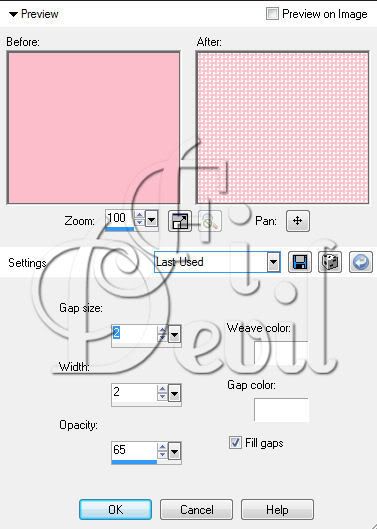
Add your tube of choice. Place between the frame layer and the circle background. Remove any extra tube that is showing outside the frame.
Select the elements you want to put on your tag and position where you like.
I used the AD_Frame as a background image, I like to place the elements on the tag and move them around till Im 100% happy with them.
I next selected the AD_Frame2 and reduced by 75%. I then selected the inside of each frame with the magic wand and then selected to add a new Raster layer.
Go to Selections - Modify - Expand - 2 pixels (See image below)
Grab your flood fill tool and fill the new raster layer in the selections of the frame with a colour complimenting your choice of tube.
I then added more tubes in the frames by ©Ismael Rac and then removed any part of the tube outside of the frame with my eraser tool.
Add the © to your tag and position on the tag where it is clear to see.
Add your name to your tag. You can apply an effect like I have. I used Eye Candy - Impact - Gradient Glow.
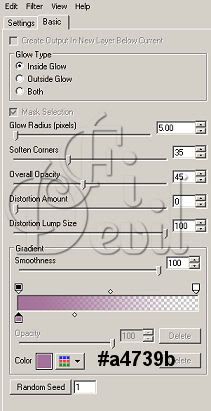
Position where you like it on your tag and then save your tag as either a PNG or JPG file.
Thank you for trying my tutorial.
Tutorial written Thursday 13th January 2011
By ©FiDevil Tutorials
Labels:
Tutorial
|
0
comments
09 January 2011
Secret Garden
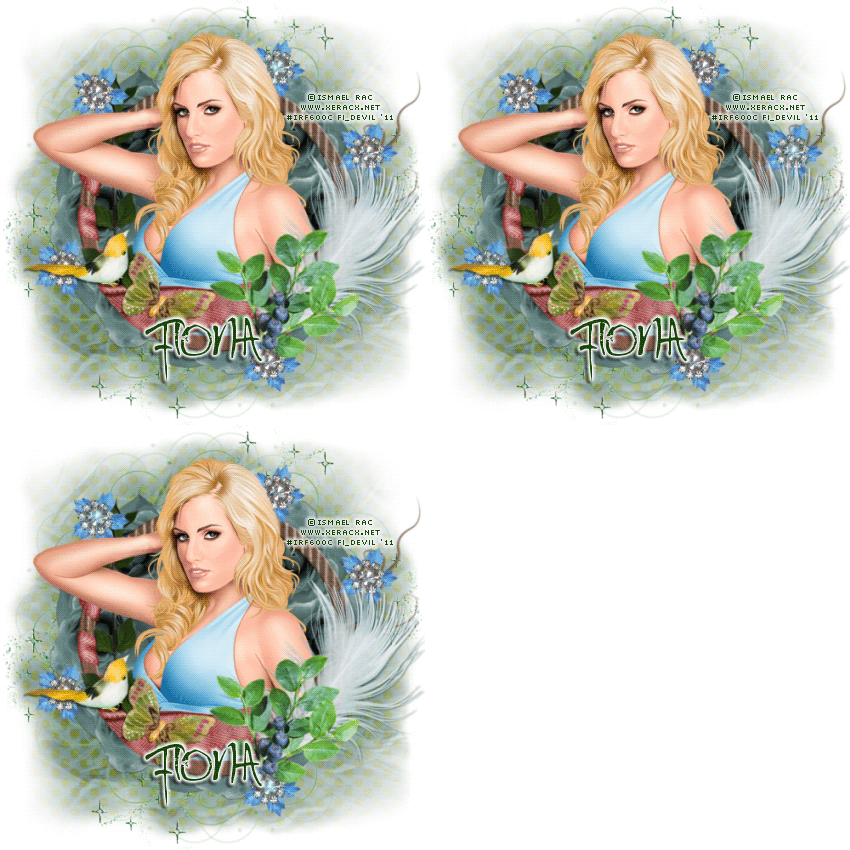
You will need:
Paint Shop Pro - I use PSP X but any version will work just as well or you can use Photoshop - I used CS5.
Animation Shop or Photoshop. I used Photoshop as the animation isnt as grainy once it is saved.
Filters Used: MuRa's Copies & Eye Candy Gradient Glow.
I'm using the wonderful artwork by Ismael Rac, you can purchase his fabulous artwork HERE
Scrap kit of choice. I used the gorgeous scrap kit Secret Garden by CBJ. You can purchase the kit HERE
Font of Choice - I used Rat Infested Mailbox.
Mask of choice. I used two for a different effect.
Remember to Save often
Lets get started:
First off start by opening a new image 500 x 500 with a white background
Open a new Raster layer and apply a background colour as a new layer, I used #6c9d63.
Apply your mask of choice. I used a mask from giZZy, and another that I found somewhere but can no longer find online.
If you own this mask, please let me know so I can credit it correctly.
Open the Secret Garden Blue Rose and copy the tube and close the original. Reduce the flower by 30%. Copy and paste to your palette.
Open the Secret Garden Dust. Copy and paste to your palette, arrange where you like it.
Now go to Effects - Plugins - MuRa's Copies with the following settings.
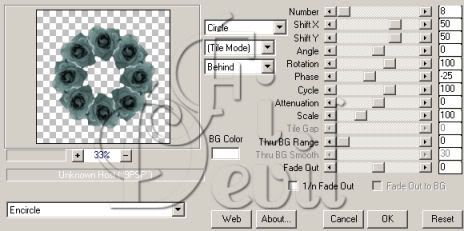
Place elements on your tag where you like. I placed the gems strategically around the flower frame I created.
I merged them together and then multiplied twice. Close off the other two layers and select the first layer.
Using your picture tube tool, select a coloured or white twinkle of choice. Apply your tube where you want the gems to twinkle. Only do one or two.
Close off this layer and select the next layer. Do the same but apply the twinkle to alternate gems. Do the same for the third gems.
Paste your tube to your tag. Then apply the copyright. I used Pixelette to write the © on my tag.
Close off the tube layer and gems. Merge your bottom elements together, leaving the tube layer and the gems layers closed off.
Duplicate the tag back twice.
Unhide the tube layer and elements you want to be on top. Copy this layer twice.
Arange the tube layer to be on top of each tag back layer. Merge the elements and tube layers together.
You now should have three layers in your layers palette.
Once your tag is merged with three final layers in the layer palette, add your name to the tag, applying to each layer.
Use a colour to compliment your tag. I used #17470d. Then applied a Gradient glow to the font as a final touch.
Save your tag in PSD format or if you dont want to animate, save as a JPG or PNG.
Now to animation shop. Open your tag in Animation Shop and select all frames. Go to Animation - Frame Properties - Set speed to 20. Now save your tag.
If you would like to animate your tag in Photoshop. Open your tag in PS.
Your screen should look like this.
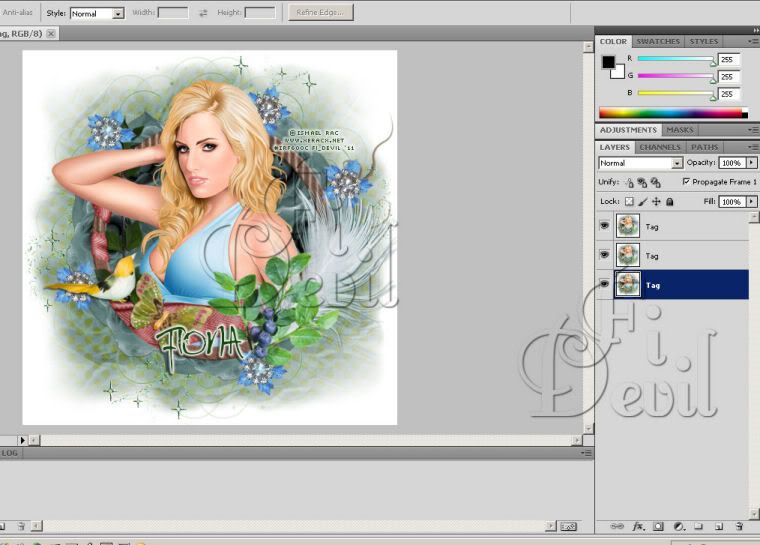
On the bottom of your screen, you should have the Animation Frames showing. If these aren't showing. In the menu bar,
select Window and make sure there is a tick next to Animation. The Animation window should be at the bottom of your screen now if it wasn't before.
In the bottom right hand side of your screen there should be an arrow pointing down. Click on this
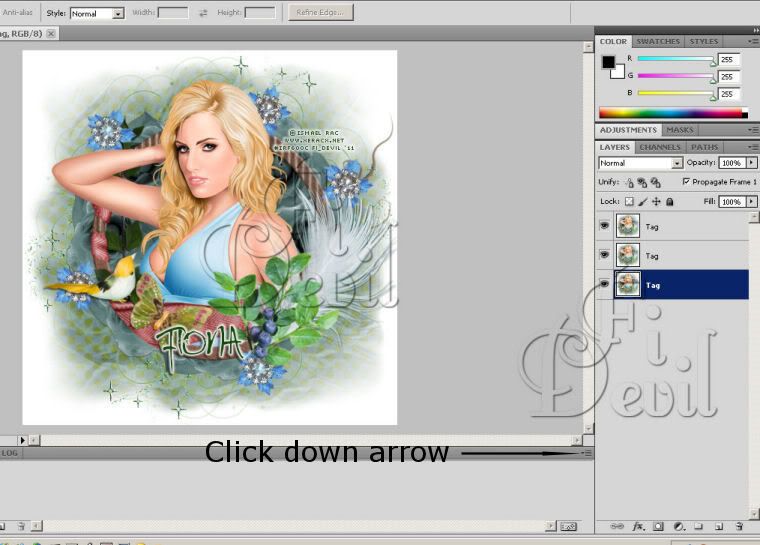
You will now see a box pop up as seen below. Select Make Frames From Layers.
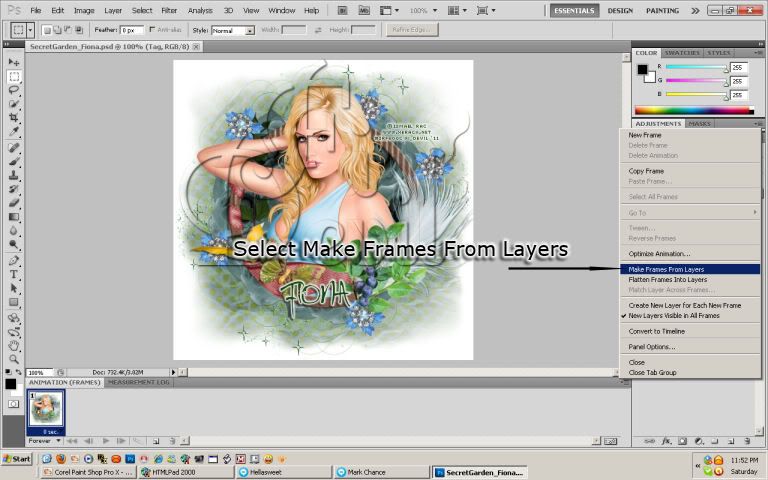
Your tag will now appear in the bottom window in the amount of frames required.
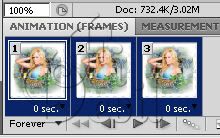
Highlight all three or however many frames you have. Select the first frame, hold down your shift key and click the last frame.
Now click on the small arrow under the first frame. This will bring up the timing frame to select the speed of your animations.
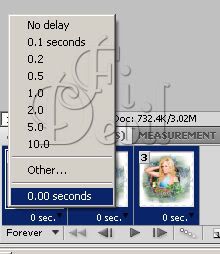
Once you have selected the timing you like, I have selected 2.0 which is 2 seconds per frame. Click on the first frame again.
Now go up to File - Save for Web & Devices. Select the settings shown below.
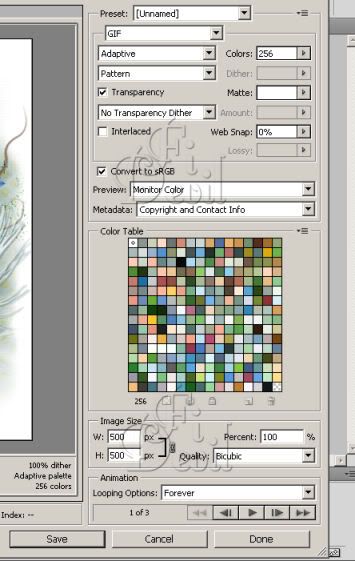
On the bottom of this screen you will see a play button. Click this to see if your animation is slow enough or fast enough.
Once you have the speed right. Click Save. This will save your tag with animations.
You are now finished.
Thank you for trying my tutorial.
This tutorial was written by me on January 8th 2011.
Any resemblance to another tutorial is purely coincidental.
©Fi_Devil Tutorials
Labels:
Tutorial
|
0
comments
Subscribe to:
Posts (Atom)


