My Blinkies
Feel free to grab my blinkie to display on your blog.


My Creative Team

Tut Writers Inc.

CT Member for


16 January 2011
Bitch Squad

I wrote this tutorial for those with a working knowledge of Paint Shop Pro.
This is all my own work and any similarity to other tutorials is purely by chance.
You will need:
Paint Shop Pro - I used PSP X but any version will work just as well. You can download a trial version HERE
Tube of choice. I used the marvelous artwork of Ismael Rac. You need a licence to use his artwork. You can purchase the tube HERE
Filters Used: Eye Candy Gradient Glow
Scrap kit of choice. I used this awesome scrap kit called The Bitch Squad by Angels Designz. You can purchase the kit HERE
Font of Choice - I used 2Peas Raspberry
Lets get Started
Open a 500 x 500 blank canvas transparent background.
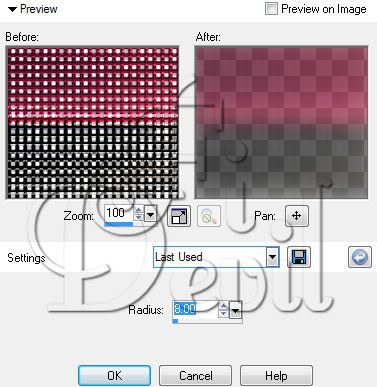
Open the AD_MeshBacking. Copy the mesh and paste onto your blank canvas. Reduce by 80%.
Next go to Adjust - Blur - Gaussian Blur Radius set to 8.00
Open AD_Frame3 and copy the frame and paste into your tag. Reduce by 75%. Select your Ellipse tool. Select the circle.
Select your colours having your Foreground colour set to a colour to either match the frame or your tube.
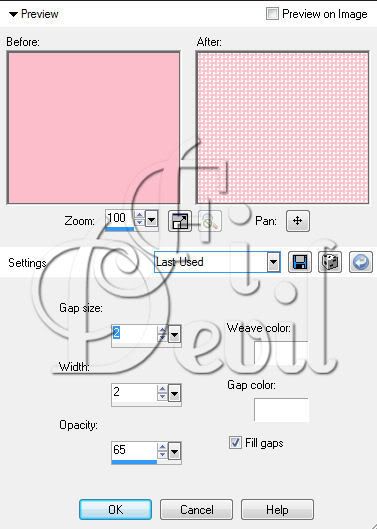
Effects - Texture Effects - Weave, Set to the settings seen below.
Add your tube of choice. Place between the frame layer and the circle background. Remove any extra tube that is showing outside the frame.
Select the elements you want to put on your tag and position where you like.
I used the AD_Frame as a background image, I like to place the elements on the tag and move them around till Im 100% happy with them.
I next selected the AD_Frame2 and reduced by 75%. I then selected the inside of each frame with the magic wand and then selected to add a new Raster layer.
Go to Selections - Modify - Expand - 2 pixels (See image below)
Grab your flood fill tool and fill the new raster layer in the selections of the frame with a colour complimenting your choice of tube.
I then added more tubes in the frames by ©Ismael Rac and then removed any part of the tube outside of the frame with my eraser tool.
Add the © to your tag and position on the tag where it is clear to see.
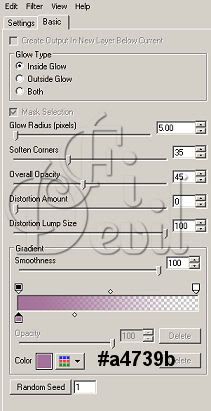
Add your name to your tag. You can apply an effect like I have. I used Eye Candy - Impact - Gradient Glow.
Position where you like it on your tag and then save your tag as either a PNG or JPG file.
Thank you for trying my tutorial.
Tutorial written Thursday 13th January 2011
By ©FiDevil Tutorials
Subscribe to:
Post Comments (Atom)

0 comments:
Post a Comment