My Blinkies
Feel free to grab my blinkie to display on your blog.


My Creative Team

Tut Writers Inc.

CT Member for


15 June 2011
Gangster Babe

I wrote this tutorial for those who have a working knowledge of PSP.
You will need:
Paint Shop Pro - I use PSP X but any version will work just as well.
Filters Used: Eye Candy Glass & Gradient Glow.
I'm using the wonderful artwork by Jose Cano, This tube is an exclusive tube to the Blammers forum. You can purchase any of his other artwork from HERE at PSP Tubes Emporium
Scrap kit of choice. Im using a fabulous kit by Angels Designz called Gangster Babe, You can find it HERE.
Font of Choice - I used Pixelette for the © and Gando BT for the name, but you can use any font.
Mask of choice. I used the a mask by giZZy. You can find her work from HERE.
Remember to Save often
Lets get started:
First off start by opening up a New Image 500 x 500 with a transparent background.
Choose a colour to match your tube and flood fill the blank canvas with it and apply your mask.
Go to your Rectangle Tool, Change your Foreground colour to a colour that co-ordinates with your tube or use a paper from the kit,
close off your background colour. I used AD_Paper2, draw out a rectangle, see settings below

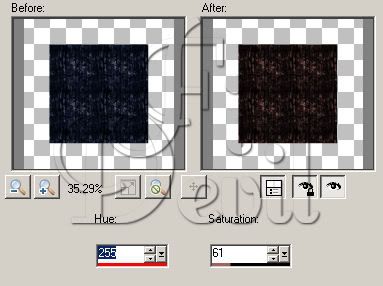
Once you have your rectangle to the size you desire. Convert to Raster Layer and apply your glass filter to the frame.
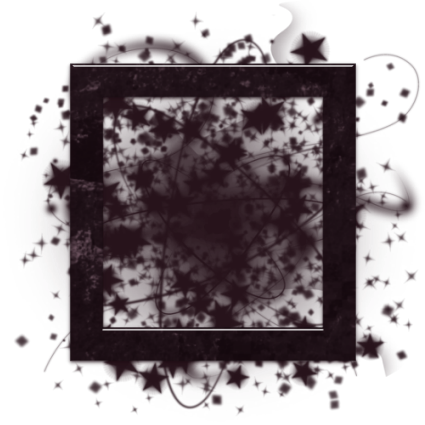
Copy and paste another of your papers under the frame, I used AD_Paper10, Resize around 35%, I changed the colour to match my tube. See below for settings.
Open the mesh element and place on your canvas. Reduce the mesh by 75% and place behind the paper layer. I also rotated it by 25% to the right. As seen below.
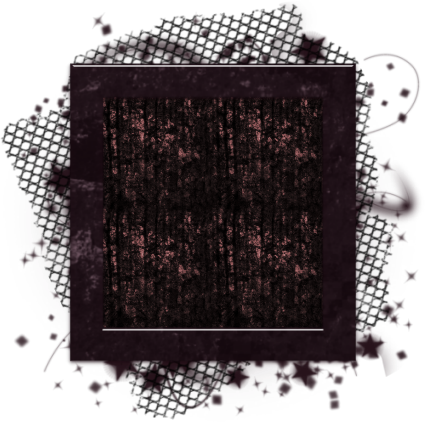
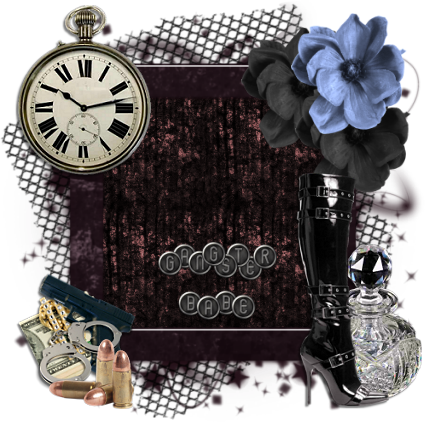
Place your tube on your canvas where you desire. I have placed mine in the frame. You can use an element or the tube in the frame.
Once you have your tube on the canvas, place behind the frame but in front of the paper layer.
Copy your tube layer and place above the frame layer. Select your eraser tool and erase the parts of your tube you dont want to show.
Erase any part of the tube that shows below the frame layer.
Remember to save your tag.
Add the copyright to your tag at this stage. I used Pixelette as this is clear and easy to read.
Place your elements where you feel they look good.
Select your Font and add your name to your tag.

You are now finished.
Thank you for trying my tutorial.
This tutorial was written by me on June 14th 2011.
Any resemblance to another tutorial is purely coincidental.
©Fi_Devil Tutorials
Subscribe to:
Posts (Atom)
